Wednesday, April 4, 2012

Pallets...The Building Blocks of Life?

In this past month I have gotten a lot done. I wanted to be further along but there is always something that is unforeseen. I got the trailer moved to its new building location(in my friend Keith's yard), the second layer of OSB on the floor, and the pallet walls up. The moving and the second layer of sub-floor was the easy part. Unfortunately, the pallets(unless all are the same size and thickness) are not the 'building blocks of life' I was hoping for.

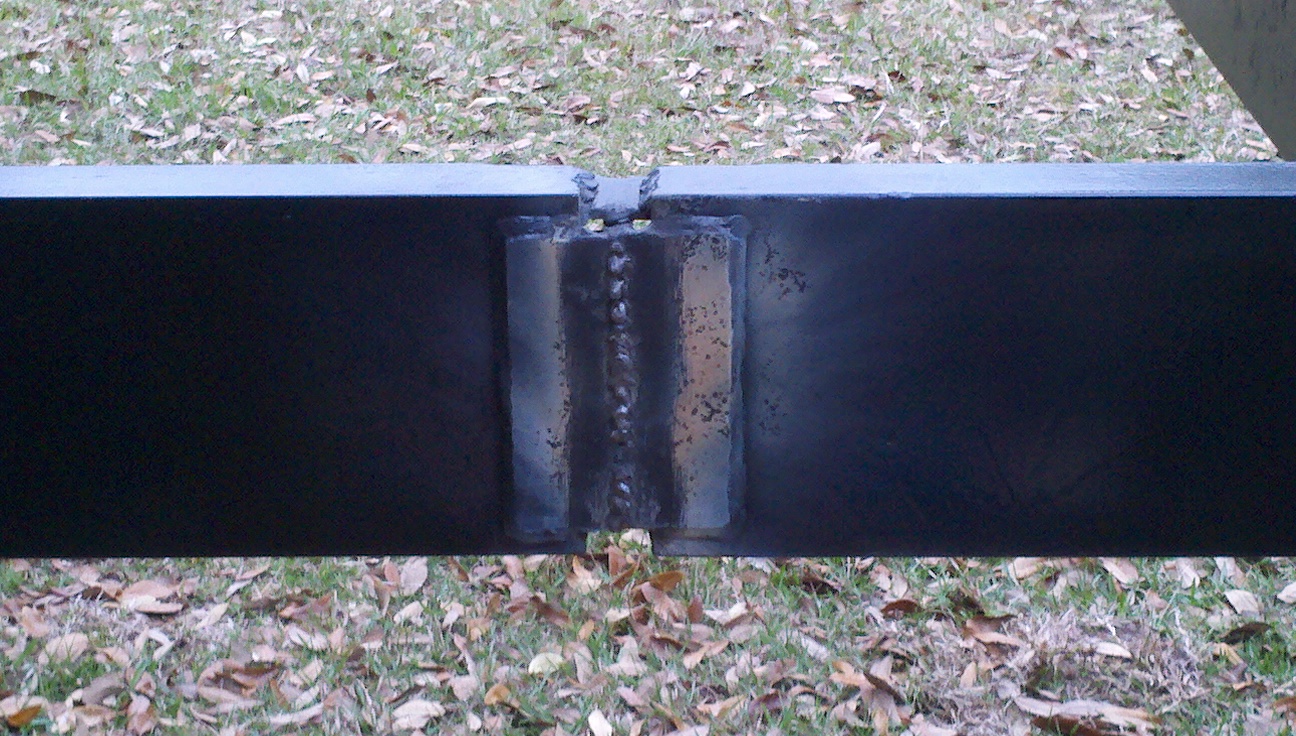
Trailer in its new location!

Just so you know: I upload my photos in order of appearance. These sliding glass doors came into my life (for free) via craigslist!! Now I have a front door! Just need to build a frame for it and it needs a new lock.
 Roughly most pallets are about the same length and height. What I didn't factor in was the thickness of each pallet. Which is probably the most important factor to consider. I would say the width is the second most important and the length the third. If all of the pallets are not the same thickness then at least one side of the wall will not be flush, so that when you apply the sheathing, the wall would be very curvy and lumpy. So when you are out treasure hunting for pallets it is important to find a place that has a lump sum at there disposal. If you go to the same source for your pallets they are most likely going to get the same type of pallet for their shipments. I'm not saying this is always the case, but it is what happened in mine. My main sources for pallets are a furniture warehouse and local microbrewery. The furniture warehouse just has a big sign by the pallets saying 'free' so that was an easy pickup. The microbrewery has many stacks for their  pallets. So I went in to talk to their shipping guy and he explained that each stack of pallets has a different function. One stack has pallets that were no longer used and were scheduled for pickup. Apparently, some guy goes around and picks up pallets, fixes them and resells them. The other stacks were for different shipping items (some for kegs and others for cases and bottles). This is a perfect example of why you should go in and ask about the pallets before you take them assuming they are free. Because even when it seems like they are free I assure you they are not. And if you get caught taking some pallets you thought were free. Then you could go to jail just like you would if you shoplifted in a supermarket. So use some common sense if you embark on pallet treasure hunting!

The first wall is made from pallets from the furniture warehouse. All of these are made from pine and are all the same thickness (5"). Pine is very easy to drill a screw through. So if you see pallets that are lighter in color it is likely that these will be easier to work with. I didn't know this before I started but I definitely know now. Most of the darker pallets are made from hardwoods and being that they are very durable also means that they are very difficult to drill through especially if your drill is not the best one you could buy!
First three pallets up!

Up!

Up!

And away!
 Now we are getting somewhere!

As you can see from the pictures I decided to put 2x4x10s in between each vertical row of pallets. I found some cool brackets at Lowes to help attach the studs to the bottom wall plate. This really helped because I am doing this one pallet at a time, not an entire wall section and then lifting them into place like traditional construction. If you have ever researched pallet sheds or houses then you are familiar with the I-Beam Pallet House design. Designed for refugees in Haiti (which never really took off), it is a cheap way to build that is actually quite durable. When the exterior wall is applied and the cavity of the pallet is filled with some sort of insulation it is considered to be just as good if not better than normal construction practices. They say that all the pallets that are thrown away in the United States every year could house the refugees of the world!! And they are free for the taking and are everywhere! You don't notice them until you are looking for them!
2x4 bracket
Each stud and each outer 2x4 of every pallet got one of these to attach to the bottom wall plate.


I extended the bottom wall plate out past the end of the trailer to allow for future aesthetic features and the power closet cavity.


 The first wall is not complete but I wanted to go ahead and start on the second wall to secure both sides so they wouldn't fall over. The second wall comes from the microbrewery. These pallets are all made from hardwoods but all are 4.5" thick and the same height and length. Now the other wall was 5" thick and this one is 4.5" thick...does this matter? you must be thinking! No, not unless you are OCD and can't get past that it's not perfect! As long as each section of wall is the same thickness then the sheathing will lay flush with the outer wall. So to the naked eye you can't even tell.

Galvanized strapping on bottom plate and each stud for added stability.


Pallet castle!

 On the back of the trailer were the two sections of each wall where the pallets had to be modified. Basically I measured what was left to complete each side of the wall and cut the pallet. I didn't cut it exactly. I cut it to leave an overhang so I could go back and cut the overlap so it would be perfectly flush with the stud. Cause pallets are not perfect- meaning they are hardly ever square! So if you measured what was needed to complete the wall and cut that precise measurement then when you put the pallet up there it could be short of where you measured it. Then you would have just wasted a pallet! Needless to say I got lucky in this instance!
End modified pallet section (left).

Right.  Notice pallet planks overhanging.  They will be cut off later.

Then the back wall was added with two 2x4s put together to fill the gap in between the two wall sections.

Something I haven't mentioned yet was the extensive use of wood clamps! These things are a necessity when building with pallets. Remember how I said pallets are hardly ever square? Well you can get them there if you secure the pallet to the bottom plate and to the bottom of one stud. Then take the clamp and attach it to the top of the pallet and the stud. Squeeze them together then secure with 3" galvanized screws. Without those clamps it would be almost impossible to get it as square as possible.

Now I have to add more studs and get these walls more straight!

In most pallets there are three 2x4s holding together the planks on each side. Two on the outside and one in the middle. The two on the outside are screwed to the vertical studs which hold up each vertical wall section. The one in the middle will have a short 2x4 cut and screwed to it to prep for rafters, and more places for sheathing to be attached to. If you notice in the picture above there are only 7 visible studs popping out above the pallets. In the picture below there are now 12 studs on one side and 13 on the other. Huh? Yes, I will explain this later. But it is what it is!

So I added more studs to the center piece of each pallet now I have to get the walls straight and figure out the pitch for the roof.

Needless to say, I didn't think these two things would be related but it turns out they were. I was going to pop a chalk line, cut the studs, and add a top plate, but these walls had other plans. So I have to say that in regular construction they do all of the walls on the ground and then lift them into place. Well, they also have multiple people working on it so they can lift it into place with a group effort. Well, I am doing this all on my own so there has to be a change in how this is put together. I did try to pop a chalk line only to find out that the walls need to be perfectly straight before the chalk line could be straight. Then I figured if I could measure each stud the correct height and then cut it I would have the correct pitch for the roof on every stud on both sides of the house right!? Wrong!

This is were the 12 studs on one side and the 13 studs on the other side comes in. So here is another example of TRY TO FIND ALL THE SAME SIZE PALLETS! The pallets on the left side of the house are  slightly less wide than the pallets on the right side of the house. So when you think you are going to connect the rafters to the studs on both sides of the house only to find out that they are not directly across from one another, you have a predicament to say the least. So since staring over was not an option I sat on the front porch and thought and looked at the house for about an hour until I figured out what I could do! See the picture below? The 2x6 nearly at the top of the studs is what had to be done! I had to connect these 2x6s at the exact pitch of the roof which at the same time would straighten all of the studs! I think these 2x6s, which came in 16' lengths, were a gift from above! I just happened to find an old pile of wood in Keith's backyard that was just wasting away but not too bad to use. Keith said it was there before he moved there and that he didn't want it! The recycle angels were looking down on me! But how could one person put up a 2x6x16 up 10' in the air by himself without a tall enough ladder!?

See 2x6 up at the top?!
Extremely carefully that's how! The pallet had to become my ladder and again the wood clamps had to become my best friend! Basically one end was hoisted up a drilled in place on the lowest pitch angle for the roof and then the other end was lifted on top of a wood clamp to temporarily hold it in place. Then I had to cut another 2x6 and attach it to the highest end of the roof a screw that into place. So if I had the highest angle and the lowest angle in place then where the two 2x6s met in the middle would be the correct angle for the roof. The highest angle is 10' and the lowest angle is 9'1". I attached the 2x6s together with a flat galvanized connecting plate. You buy those the same place where the hangers are sold at Lowes. Then each stud had to be attached to the 2x6s. I had to drill pilot holes and then put screws in. Just imagine me climbing the pallets holding on for dear life, drilling a pilot hole, changing out to a philips head bit, screwing the screw in all while up 8 ' of of the ground. It was not easy! Imagine doing construction while climbing a rock wall. It was not fun and I am very sore not to mention I threw my arm out from drilling so much!


I was laying down resting and thought this was a cool view!


My pathetic step ladder!

The 2x6 for the other side is done!


Planks cut!

 I also started on the first piece of OSB for the siding and cut a 2x6 for the front wall which connects to the 2x6s on the side walls. I can already tell how much more sturdy it is getting! My dad comes to help this week and he will bring a taller ladder, a reciprocal saw, and an extra pair of hands which will come in handy for the OSB siding.

So next will be cutting the excess studs off of the top so you can see the roof pitch, installing the roof rafters and top plates, and the siding and roofing material. After that will be to wrap the walls and roof in house wrap and some sort of roofing felt. If we can get that far I will be truly excited! If we are really productive then we will probably install the front door and maybe a window!

 Until next time! Wish me luck!

Sunday, March 11, 2012

Goin' With the Flo'


Now that the repaired trailer successfully made it back to my house. I can now start installing the frame for the floor and sub-floor. Before I left my parents house, over the Mardi Gras holidays, I needed to run some lumber through my dads table saw. The wood that needs to go inside of the c-channel steel needed to be cut at a 7 degree angle and then run through a router to get the correct curve that is inside of the steel in order to sit flush. The top lighter colored wood are 2x6s that I had to buy from Lowes, and the bottom darker 2x4s came from an old church in Alexandria, La, that my dad is renovating (Yay free stuff!). This step was pretty easy and only took part of a day to install everything. First, I dry fitted some of the wood to make sure everything fit and then applied liquid nail to the backside of the wood to help keep the wood in place. It all fit very snug but the extra adhesive didn't hurt.
Wood inside the frame (drivers side)

Wood inside the frame (passenger side). Some of the wood needed to be clamped because some were slightly warped.

Watch those trailer light wires. Make sure they don't get crimped!

Fit nice and snug!
 Next came time to hang the floor joists. I thought this was only going to take a day to do but it took about two instead. Turns out that hanging floor joists is probably a two man job! Oh well, I made it work. To make the floor joists sit flush with the top of the steel frame I had to cut about a quarter inch notch on each side of each joist. If I got it perfectly cut the joist would fit snug into the frame and would then be easy to install the hangers. I got it snug about 60% of the time I guess. The other 40% required me to hold the joist on my shoulder and hold the drill, hanger, and screw all at the same time to get it hung up there. It was a balancing act and sometimes frustrating but I eventually got it. Also don't let your wood sit for too long because some of them could start to warp very quickly. And I remember when I bought the wood I checked every piece to make sure nothing was warped, but inevitably some pieces just did it anyway.
Making some progress!

Most of the joists are in now.

View from the back. See the small rafter between the first and second joist?  The second one was warped bad and I had to pull them together with that rafter. It was a battle!
Now for the front porch!

The porch measures 4x8 and is covered with 8' treated decking. At first I was going to install the full 8' board across the width of the trailer but I would have had to put in more rafters in between the joists and I didn't feel like doing that. It seemed like more work. So I decided to cut pieces to lay them horizontally with an 8' piece on the front to kind of cap everything off. I think it made for a nice look. At this step in the process I dry fitted everything first before I screwed the boards to the joists. I had to get all of the gaps in between the decking correct and make sure it all looked even and flush. I took many steps back and took a long look to make sure it was pleasing to the eye. I mean, it is the front of the house and the first thing people are going to see. You don't want to invite the first person to your house and have them tell you something doesn't look straight, what a bummer that would be! I wasn't worried about the back of the porch being perfectly even because it will eventually be trimmed in and you won't be able see it anyway. But all in all I think the porch is a success and I can't wait to give it a nice dark wood stain like you would see on a sailboat or something.
The front porch is now complete!

Side porch view
Now finally for the first layer of OSB sub-floor.

To cover the entire trailer I only had to buy 5 4x8 sheets of OSB. It all fit very nicely and I only had to cut an inch and a half off of the piece laying next to the front porch. I got it all flush and was ready to screw these suckers in! It took two half days to complete this! While most of the floor joists are wood and it was easy to screw the OSB into them. The other joists were steel cross pieces of the trailer frame and it took some time to drill through the steel. All around the sides of the trailer I screwed in 1/4" hex screws to attach it to the wood that was running on the inside of the steel frame. That was pretty easy and I thought I could put in self-tapping wood to steel screws for the other spots. Oh no, that was not the case! While the self-tapping screws attached to the angle iron joists fairly easily, it was a way different story going through the c-channel joists. The steel on those guys are much thicker and the screws would not even come close to tapping themselves. So I had to drill through them and bolt the OSB down. While this worked for a little while it became harder and harder to drill through the steel. And then all of a sudden-Snap! My drill bit snapped in half! And then another one and another one! Three bits in a row. I thought I had all titanium bits and that would do just fine but apparently, after some research, Cobalt bits are better to use for steel. They can still break, but if you are careful they can work. Turns out that right when the bit is about to penetrate the other side of the steel is the most likely time that the bit will snap. It gets snagged on a few of the last shards of steel sticking out the other side. So if your drill starts to get stuck just back it out and slowly work your way through.
All of the OSB is now attached to the frame!

Success!

The next step is to now move the trailer to my friend Keith's house to finish building the house. I was planning on finishing it at my house but my landlord wants it gone. So thankfully Keith saves the day again! I also gave myself a deadline for getting this thing livable...June 1st! I told my landlord everything I was planning on doing and told him I would be out of the house by then. It is kind of scary to think about all I have to do between now and then but it is very exciting!

This is the first layer of OSB for the sub-floor and originally all I was planning on doing. But as I walk on the floor now I feel it needs to be stronger. I was researching online and I found a contractor that said you could glue down another layer of OSB and it should be a lot stronger. Then when I put the wood floors in everything should feel nice and solid.

Most tiny house builders put in the floor insulation at this time as well. And I am sure some of you might be wondering why I skipped this step. Well, one reason is I left the insulation I had at my parents place. My dad will bring it for me when the Easter holiday gets here. Second, the trailer, when even with the ground, sits about 3 feet high from the ground. So there will be plenty of room underneath to get the insulation, plumbing, electrical, or gas lines in. And then one day when I am done under there I will completely enclose it with something, probably aluminium sheets, but I'm not exactly sure about that yet. And because the trailer sits so high from the ground I now have to change part of my original interior design that I had revealed in a previous post. I can no longer use the sliding glass door that was going to be the bathroom door and wall. The door itself measures 6'8"h and when you add 2x4s under and over it to frame it in and not to mention the floor joists for the loft on top of that, that leaves little room up in the sleeping loft. To be street legal the house can only be 13'5" tall. So if I use the sliding glass door it would only leave like 2' up in the loft and while that might be enough for me to lay down it will definitely not be enough room for me to sit up. So the sliding door will now be used as the front door to my hoop greenhouse on the farm!

Turns out that taking out that door opened up new interior design possibilities. So now I will have to go back and draw up some new plans from the same program I used last time. But from the rough sketches I drew up at 3 in the morning just the other night, it will make the space even more fantastic! All will be revealed in due time. The only thing I can think of to describe what it will look like is these three things: Swedish IKEA design, a cube house, and a yacht all wrapped up into one!

So I will leave it at that until next time! The next step will be to haul the trailer to Keith's, double up the OSB, and start the pallet walls!

Wish me luck!


Tuesday, February 28, 2012

Mardi Gras Tiny House Trailer* Madness! *Warning: Do not try this at home!

 Well, a long story short I finished building the trailer. I spent about an entire week working like mad for twelve hours a day trying to complete this thing before my Mardi Gras break was over and I had to go back to work. You see that little warning disclaimer in the headline of this post? Warning: Do not try this at home! I am very serious when I say I wouldn't recommend it. On the difficulty level it is probably a 8 or 9, it's not rocket science or anything but it is a serious undertaking. If you don't have any welding experience and no one to take you under his/her wing. Don't even try it. I am just lucky that my dad has every tool known to man that I could use to help me build this thing. And not to mention my father's brain to pick when I had a question or a concern or needed a second opinion. Let's take the first picture below as an example. Those are the axles hanging from the frame. Well, before we hung the c channel steel brackets to the hangers on the springs we just welded the hangers to the frame. What is wrong with that you say? We tried to put the tires on and the tire was running into the frame and I couldn't even get the tire on. So I had to cut the hangers loose and fabricate the c channel steel brackets that would hang the axles lower so the tires would fit. That mistake right there cost me almost a whole day.
Axles with new brackets for the hangers to lower the axles from the frame.

 But hey, we got those pesky axles on and by that time I could see it was starting to look more like a trailer. Next we got the tongue of the trailer attached. It takes a second to get it up in the air, clamped to the frame, and lined up, but it wasn't so bad.
The trailer now has a tongue!
 Now for more work on supporting the axle brackets with angle iron in between them so the brackets would not bend whenever it was being transported. I also primed the hubs and some of the other axle supports at this point.

Primed hubs and supports.

Primed supports and all the spots I welded to prevent rust.

 Now time to put on the wheels. You may have remembered that these axles are mobile home axles which are different from standard wheels and axles you would see on a normal utility trailer. When you put mobile home tires on the hubs the lug nuts come with a bracket that clamps the wheel to the hub. Now you have to get these tight or you might have a wheel come flying off on the road!
Got the wheels on. Luckily my dad's ginormous lift was able to jack up the entire trailer  to make this step easy.
 Originally, we got two standard axles instead of one brake and one standard axle. My dad went back to the guy you sold us the axles and just traded one of the standard axles for a break axle. Each axle was $75 each and each tire was only $25 each! What a deal when you see what the prices are for a brand new axle! The savings are tremendous. Go to the yellow pages and look up mobile home movers. These guys have this stuff just lying around. Be careful about putting these axles on your trailer because some states won't register a homemade trailer with mobile home axles because they consider these axles to be used only temporarily while moving mobile homes. But in all honestly they will work fine. You only need to cut them down so they fit the 8 ft width limit. And in my case in Louisiana, it is not an issue. I'll get more into the registration process later in this post.
Brake axle

Standard axle

 It moves! We hooked it up to the truck and put in the parking lot next to my parents loft to prep and start painting the first coat.
Truck and trailer unite! You may notice the trailer looks a little tilted. That's because we don't have the new ball mount in yet and this is the old one.

Rear view

Underneath

Covered tires to prep for painting. 

First coat: Rustoleum exterior gloss paint.

Second coat
 The lights, the infamous lights...oh how I hate you!

I thought this was going to be one of the easiest parts to building this trailer. Boy was I wrong! I purchased a light kit from Buccaneer Truck Stuff in Alexandria, La. These guys have all the stuff you need if you are building a trailer. I started putting on the rear lights and realized the way the frame was done I couldn't mount the lights evenly on both sides. So I had to fabricate some mounting brackets for the lights. That was actually the easy part. For the front side clearance lights I had to drill through the frame and attach the lights with a nut and bolt.


Front side amber clearance lights(on each side). Tractor Supply $5 each. These are wired into the brown wire on each side.

Rear LED lights with signal, side view, and license plate light.
 To wire up all the lights and the brakes you need a 7 way RV plug and the attachment for that on you truck. Luckily my truck had that already. But be sure to check that all the pins are not bent out of shape. My pin for the ground cable(white cable) was bent and nothing was getting power to the lights (Thanks to Danny at Buccaneer for figuring that out!). Then after everything was wired up the lights worked for a second but then all of a sudden we had no light. We checked the fuses but couldn't see that any were burned out. We were at a loss. We had double checked everything to figure out that it probably was a fuse but couldn't figure it out. So we carefully towed the trailer over to Buccaneer to see if Danny could figure it out. Turns out that one of the fuses for the lights was wrong. There was a 15A fuse where a 20A fuse should have been. After Danny quickly figured that out we were in business. We also got the new ball mount that will sit the trailer even with the road and not tilted like in the previous picture. Thanks Danny!

At this point we were racing against the clock. It was about 2:30 on Friday afternoon and I wanted to get the trailer inspected by the state police before 5. But we still had to wire one more side clearance light and weld on the trailer tow chains to the tongue. So while my dad wired up the light I welded the chains on and touched it up with paint.

To register a trailer (in Louisiana), you need to get a homemade trailer affidavit from any Louisiana state police office and get it signed and notarized by any state certified notary. Then you have to bring it back to the state police office and turn the affidavit in so they can inspect and stamp the serial number on your trailer. They will literally bring out a hammer and pound it in on the tongue next to the coupler. I didn't know how strict the inspection process was going to be but the officer just said, "Now that's a trailer!" Then he asked me if the lights worked and I said yes. He didn't even make me turn them on. He then pounded the numbers in and handed me my receipt to take to the DMV. That was it! At this point it was 4:30. I made it just in the nick of time! The officer said my receipt was proof that it was registered and that I could go ahead and move it to take it to the DMV of my choosing. That was what I needed to hear to go ahead and make the trek home 3 1/2 hours away.
Here is the completed trailer all hooked up and ready for the road!


Lookin' good!
 So I embarked on my first journey on the road with this thing. All was fine for the first two hours of the trip. I remember hitting some bad bumps after I crossed the Mississippi bridge in Baton Rouge. Then some guy pulls up on the side of me saying that something fell off my trailer. Well, it was already dark so I had to stop and pull over to see what was wrong. One of the supports between the axles was gone and some others were loose. But the main thing was one of the c channel welds snapped! This is the warning I put in the headline of this post. If you don't do this right the consequences could be drastic. From Baton Rouge to home I drove about 40mph with my flashers on. What should be an hour trip from Baton Rouge took two and a half. It was extremely stressful and I don't recommend it! These next few pics are the trailer the next day after I thankfully made it home.
Broken weld on the side of the frame. Not good!

Missing axle support 


Broken droopy trailer :(
 So now I have to repair this somehow...hmmm?

Well, that brings my friend Keith to the story. He also has every tool known to man. But more importantly a welding machine. He was kind enough to let me use his shop and use whatever I needed to make this trailer right again. So all day Sunday and Monday morning I welded and welded. Fixed the broken stuff, re-welded spots I thought might be a risk, and added some new supports to weak spots. I also had to rewire some of the light because the wires snapped when the frame broke and drooped down.
Re-welded some key structural spots.

This weld actually broke as well but the bolts on the inside kept it together.

Re-welded axle supports.


This was the main brake in the frame. There is now a 1/4 inch steel plate about a foot long behind this welded into place for added support.

She's back in business! Re-welded and supported, re-painted, and the lights work again! Thanks Keith!
An extra thing I did not mention was what I was using to jack up this heavy trailer with! On most trailers people permanently install a 2,000 or 5,000 pound jack onto the tongue and just wind it up to the height they need it. But I chose to buy what is called a farm jack and I am so glad I listened to my dad on this purchase. It is so versatile. Not only can I lift up any part of the trailer(not just the tongue), but this will become an invaluable tool for life on my farm. This thing could get my truck out of a jam, uproot small trees for clearing land, and even stretch wire for fencing. In fact I would not have been able to get the trailer repaired if I didn't have this jack. It helped me get the side of the trailer level so I could weld it back together.
48" tall 7,000 lb. farm jack
After all the repairs were done I took my receipt I got from the state police and took it to the DMV. I gave it to the person working there and she just needed my license and money for fees. There is a handling fee, registration fee, and license plate fee(they give you three choices: Re-register every year in June($10), every four years($40), or a permanent registration for ($70). I chose the yearly fee because I didn't have enough cash with me. In all it cost me $41.50. So bring enough cash for whatever choice you make. The only other questions she asked were the color of the trailer and would it be carrying more or less than 500 lbs. They didn't even look at the trailer. I guess the receipt from the state police is enough for them. But she gave me my license plate on the spot and now I have a registered 'utility trailer.' Now it's finally time to start building the house on top of it!

So there were some ups and downs in building this but I finally did it and I can't really believe it myself! My next post will be installing the floor frame and sub-floor sheathing.

Wish me luck!